
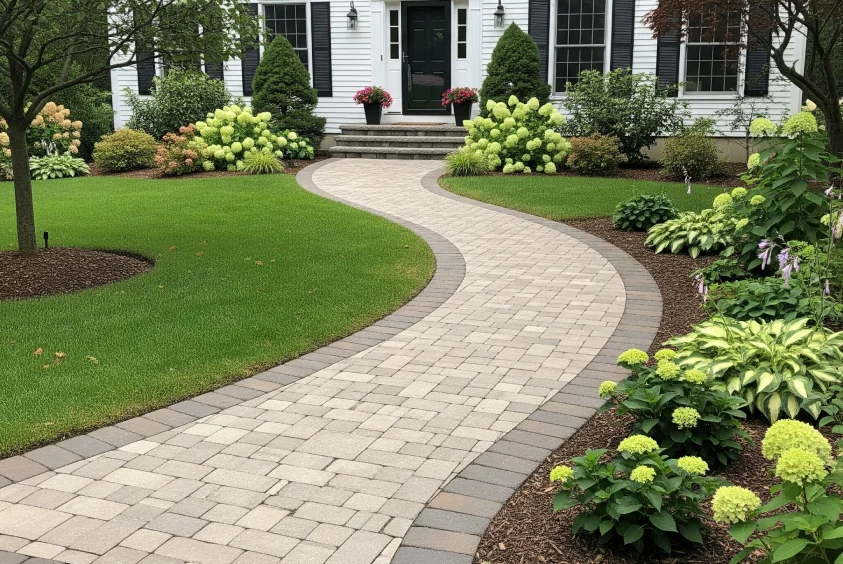
Best NJ Paver Sealing Tips, Climate Guide & Maintenance Schedule
What You Should Know Before Sealing Pavers in NJ
- One of the biggest threats to unsealed pavers in New Jersey is the state’s freeze-thaw cycles. When water gets into the joints and freezes, it expands, causing the pavers to crack and shift from below.
- The best time to seal pavers in New Jersey is in the early fall. It’s warm enough for the sealant to cure properly, but it’s before the first hard freeze.
- Most paver installations in NJ need to be resealed every 3 to 5 years. However, the exact timeline can vary depending on factors like traffic levels, sun exposure, and the type of sealer used.
- Sage Landscape Contractors and Tree Experts specializes in working with properties in New Jersey. We understand the local soil, drainage, and seasonal conditions that can affect the lifespan of your hardscape.
- Most paver manufacturers recommend avoiding one specific type of ice melt product. Chances are, it’s the one you currently have in your garage.
When properly sealed, pavers can last for decades. But if they’re not sealed? In New Jersey, they can start to deteriorate in just a few seasons due to the climate.
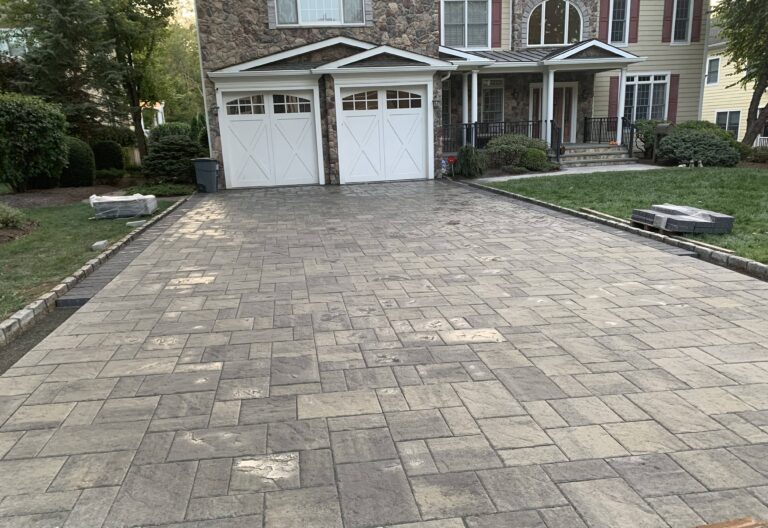
People in New Jersey spend a lot on their driveways, patios, and walkways. But, unfortunately, many of them see their investment start to crack, move, and get stained because they didn’t seal it or waited too long to do it. Knowing why it’s important to seal these areas, especially in New Jersey, and not just in general, can mean the difference between a hardscape that lasts and one that needs to be completely replaced after ten years.
New Jersey Winters Can Wreak Havoc on Unsealed Pavers
It’s not just the cold temperatures that cause the problem. It’s the cycle of freezing, thawing, and refreezing that happens over and over again during a typical New Jersey winter. Each time water gets into an unsealed paver joint and freezes, it expands with a lot of force. Over the course of several seasons, this expansion can cause the joints to pry apart, individual pavers to heave upward, and the base underneath to become unstable. What starts out as a slightly wobbly paver can become a tripping hazard. What starts out as a tiny gap can become a drainage issue. Sealing doesn’t just make the pavers look better — it prevents water from getting in in the first place.
Why Pavers in NJ are More Susceptible to Freeze-Thaw Cycles Than Most States
New Jersey is located in a climate zone where temperatures frequently fluctuate above and below freezing multiple times each winter — not just once or twice. This continuous cycling is what differentiates the wear on NJ hardscapes from warmer states where freezing is uncommon, or colder northern states where the ground remains frozen for several months at a time. In NJ, the ground never fully settles. It freezes, thaws, and freezes again, and each of these transitions places strain on your paver system.
With years of experience working on properties in New Jersey, the team at Sage Landscape Contractors and Tree Experts understand how the local climate can quickly damage pavers that are not properly cared for. This local knowledge is invaluable when it comes to identifying problems and deciding on the best course of action.
How Freeze-Thaw Cycles Impact Paver Joints
The first thing to go is the joint sand. When water freezes and expands inside paver joints, it forces the sand out from under and between the pavers. Once the joint material is compromised, the pavers lose their interlocking stability. This means they start to shift, rock, and tilt under the weight of foot and vehicle traffic. The once solid surface begins to feel uneven.
Water can seep under the bedding layer over time and cause the base to settle. One of the most common and frustrating issues that NJ homeowners encounter after a harsh winter is frost heave, which is the upward movement of pavers due to the expansion of frozen soil. It is crucial to identify this issue early before it worsens.
Once the base starts to fail, the repair becomes much more complex. Often, the pavers need to be removed, the base needs to be regraded and compacted, and everything needs to be relaid from the beginning. Preventative sealing and yearly joint sand maintenance are much cheaper than this repair.
The Impact of NJ’s Four Seasons on Hardscapes
While the winter freeze-thaw often gets the most attention, the reality is that the full cycle of seasons in New Jersey can put a lot of stress on pavers. In the summer, UV exposure can break down unsealed surfaces, leading to fading and surface erosion. Spring brings heavy rains, which can wash out joint sand and create the perfect conditions for weeds to germinate. In the fall, leaves and other organic debris can sit on pavers and in joints, causing staining and encouraging the growth of algae and moss.
Every season brings its own set of challenges, which is why maintaining your pavers in New Jersey is a true year-round job — not just a once-in-a-while task.
The Impact of Drainage Issues on Freeze-Thaw Damage
When pavers are surrounded by or covered in standing water, freeze-thaw damage can occur at a much faster rate. If there are low spots on your paver driveway or patio that collect water after it rains or snow melts, those spots are taking in a lot more water than the rest of the surface. This standing water can freeze and cause the expansion forces in those areas to push up large sections of the paver field.
You may not notice drainage problems until winter brings them to light. When winter thaws, take a careful walk over your paver surfaces and look for any spots where water consistently pools. You’ll need to get professional help for those areas before the next freeze cycle starts.
When is the Best Time to Seal Pavers in New Jersey?
Getting the timing right for a sealing project is just as crucial as the type of sealer you use or the preparatory work you do. If you apply the sealer under inappropriate conditions, you could end up with a cloudy, uneven, or peeling finish that looks worse than if you hadn’t sealed at all.
Why You Should Seal Your Pavers in Early Fall in NJ
Early fall, which usually falls between late August and October in New Jersey, is the perfect time to seal your pavers. The daytime temperatures are warm enough to allow the sealant to cure properly, the evenings are consistently above 50°F, and the surface has not yet been exposed to the first hard frost. Sealing your pavers during this time allows the sealant to fully cure and bond before the freeze-thaw cycles begin. This is the most dependable time to schedule your paver sealing in New Jersey.
Sealing in the Summer: The Conditions You Need to Wait For
Sealing in the summer is doable, but it needs patience. Pavers have to be totally clean and bone dry before any sealer is applied. In the summer, afternoon humidity and random thunderstorms can make it hard to find a long enough dry window. If the surface holds any moisture — even from dew the night before — the sealer will trap that moisture and turn milky white as it cures.
Make sure the surface is dry for at least 24 to 48 hours before sealing, and double-check that there is no rain expected for at least 24 hours after application. Try to avoid sealing in the peak afternoon sun on hot summer days because the sealer can dry too quickly and leave lap marks.
Weather Considerations Prior to Applying Sealer
There are a few general guidelines to follow no matter what time of year you are applying sealer: the air and surface temperatures should be between 50°F and 90°F, the surface must be totally dry, and there should be no rain in the forecast for at least 24 hours after application. Additionally, the temperature should remain consistently above 50°F during the curing process. If sealer is applied outside of these conditions, it will not bond correctly and will need to be removed and reapplied — a costly mistake that is completely avoidable.
Don’t just check the weather for the day you’re planning to seal your pavers. Look at a 72-hour forecast instead. The weather in New Jersey can change rapidly, and if an unexpected storm rolls in during your sealing project, it could ruin the entire application.
Selecting the Perfect Paver Sealer for New Jersey’s Climate
When you visit a home improvement store, you’ll see rows and rows of paver sealers, each boasting its own set of benefits. However, for homeowners in New Jersey, the key differences boil down to two types of sealers: penetrating sealers and film-forming sealers. They each interact with surfaces in unique ways, provide varying degrees of protection, and are best suited for different objectives.
Penetrating sealers sink into the paver material and offer protection from the inside out, without altering the surface look. These are a solid option for natural stone pavers or for homeowners who like a natural, matte appearance. Film-forming sealers, on the other hand, rest on the paver surface and create a protective layer that can range from matte to high-gloss. These types of sealers enhance color and provide a more noticeable layer of protection against staining and surface wear. However, they require more meticulous application to prevent moisture entrapment or the creation of a slippery surface.
In New Jersey’s climate, it’s important to choose a sealer that can handle freeze-thaw conditions. Not all sealers can do this, so you’ll want to find one that specifically mentions resistance to freeze-thaw cycling, UV stability, and joint sand stabilization. A sealer that can lock in the joint sand while also protecting the surface of the paver is a great way to take care of two maintenance tasks at the same time.
Penetrating Sealers or Film-Forming Sealers?
Penetrating sealers get their name from the way they function. They penetrate the paver material on a molecular level, filling the pores and creating an internal barrier against water, salt, and staining agents. Because they do not sit on top of the surface, they cannot peel, flake, or trap moisture — which makes them a great choice for New Jersey’s wet springs and humid summers. The downside is that they offer less stain resistance on the surface itself compared to film-forming products.
Film-forming sealers offer a protective layer over the paver. Wet-look and high-gloss options are included in this category, and they really bring out the depth of color in concrete and brick pavers. They also lock polymeric joint sand more effectively than penetrating sealers. The most important thing is that the surface has to be completely dry before application — any moisture trapped underneath a film-forming sealer will cause whitish hazing that is hard to reverse without completely stripping the product.
In most cases, a water-based acrylic film-forming sealer that’s rated for freeze-thaw conditions is the best choice for New Jersey driveways and patios. This type of sealer provides strong UV protection, enhances color, stabilizes joint sand, and is reasonably durable. Under typical New Jersey conditions, you can expect it to last 3 to 5 years before you need to reapply it.
How Sodium Chloride Ice Melt Damages Your Sealer
In New Jersey, rock salt, or sodium chloride, is the most common ice melt product. However, it’s also one of the most harmful to pavers and their sealers. Sodium chloride aggressively lowers the freezing point of water, creating a brine solution that corrodes both the surface of the pavers and the joint sand beneath them.
Even if your pavers are sealed, using rock salt repeatedly can speed up the degradation of the sealer film, strip the color from the paver surface, and damage the concrete or clay material underneath. If your pavers are unsealed, the damage will be even worse and more immediate. Over the course of several winters, surfaces that have been treated with salt can develop a pitted, spalled texture that can’t be reversed without replacing the pavers.
Most paver makers suggest using calcium magnesium acetate (CMA) or magnesium chloride-based de-icers, as they are much less damaging to hardscape materials. Sand is another alternative for grip that does not introduce any chemicals. Regardless of the product you choose, make sure to thoroughly rinse your paver surfaces in early spring to get rid of any leftover chemical deposits before they can penetrate deeper into the joints and the base layer.
How to Seal Pavers: A Guide for NJ Homeowners
Sealing pavers in New Jersey is not a complex task, but it is one that doesn’t take kindly to cutting corners. Every step in the process is there to ensure the success of the next one — if you skip the prep work, even the highest quality sealer will fail before its time. If you follow these steps in order, you’ll have long-lasting results.
Give yourself at least two full days to complete this project. The first day will be spent cleaning and preparing the area. The second day will be spent sealing the area, but only after you’ve made sure the surface is completely dry. The main reason do-it-yourself sealing projects have to be redone within a year is because people rush these two steps.
1. Start by Cleaning the Paver Surface
Begin by removing all furniture, plant pots, and other items from the paver surface. Use a stiff broom or a leaf blower to remove any loose debris, leaves, and dirt from the surface and the joints between the pavers. Then use a cleaner that is safe for pavers, following the instructions on the label. If there are white mineral deposits on the pavers, use a cleaner that removes efflorescence. If there are oil or grease stains on a driveway, use a degreaser. Pressure wash the pavers at a moderate setting (1200 to 1500 PSI for most residential surfaces) to remove embedded dirt, algae, and moss without damaging the surface of the pavers. Make sure to work in a consistent pattern, overlapping your passes, and rinse thoroughly.
2. Remove Weeds and Refill Joints With Polymeric Sand
Once you’re done cleaning, check each joint. Manually remove any weeds or use a specific weed killer, ensuring the product is safe to use around hardscapes and close-by plant beds. Let any chemical treatments to completely dry before proceeding.
After the joints have been cleaned, check the depth of the sand. If the joint sand has sunk more than a quarter inch below the surface of the paver, it needs to be refilled before sealing. Polymeric sand, which contains binding agents that harden when activated with water, is the top choice for installations in New Jersey. This is because it is more resistant to washout and is better at preventing future weed germination than regular bedding sand.
First, you should spread polymeric sand into the joints. Then, use a plate compactor or hand tamper to compact the surface. Next, sweep the surface again to fill any remaining voids. After that, lightly mist the surface with water to activate the binding agents. Let it cure completely, which usually takes 24 hours, before applying the sealer. If you seal over uncured polymeric sand, it can interrupt the binding process and make the joints soft.
3. Ensure the Surface Is Entirely Dry Before Sealing
This is the step most homeowners overlook. Even after a full day in the sun, pavers can still hold subsurface moisture — especially in shaded areas, near garden beds, or in low spots where water tends to pool. Test dryness by taping a piece of plastic sheeting to the paver surface and leaving it for an hour. If condensation appears on the underside of the plastic, the surface is not ready. Wait another 24 hours and test again. Applying sealer over damp pavers is the number one cause of milky, hazy, or peeling finishes.
4. Evenly Spread Sealer and Avoid Pooling
Apply the sealer using a low-pressure pump sprayer or a paint roller with a 3/8-inch nap. Divide the area into manageable sections, and keep a wet edge to prevent lap marks. Apply the sealer in thin, even coats instead of one thick coat. Sealer that pools in low spots or joint lines will dry unevenly and can become slippery when wet.
- Always start from the point farthest from your exit and work your way towards it so you don’t walk on freshly sealed pavers.
- Keep a steady pace and overlap each pass by about 30 percent.
- Use a back-roll method for areas where the sprayer has deposited too much product.
- Have a dry brush or roller on hand to immediately spread any pooling in joint areas.
- Once the first coat has dried to the touch, which typically takes 2 to 4 hours in good conditions, apply a second coat.
Applying two thin coats will always yield better results in terms of appearance, durability, and resistance to peeling than one thick coat. This holds true no matter which sealer product you choose.
Steer clear of sealing in the direct midday sun during the summer. High surface temperatures can cause water-based sealers to dry too quickly before they can properly penetrate or bond, which can leave a streaky finish. Applying early in the morning — after making sure there’s no overnight dew — provides the best surface conditions during the warm months.
As soon as you finish using your sprayer and tools, clean them with warm water if you’ve used a water-based sealer. If you’ve used a solvent-based product, clean your tools with the right solvent. It’s very hard to get dried sealer out of applicator equipment.
5. Wait For The Paver Sealer To Fully Cure Before Allowing Foot or Vehicle Traffic
Most water-based paver sealers are dry to the touch within 2 to 4 hours, but full cure — the point at which the sealer has hardened completely and bonded to the paver surface — takes 24 to 72 hours depending on temperature, humidity, and the specific product used. Light foot traffic is generally acceptable after 24 hours. Vehicle traffic should be kept off sealed driveways for a minimum of 48 to 72 hours.
Make sure to keep the surface dry while it’s curing. If it rains within the first 24 hours after you apply the sealer, it could get washed away or become blotchy. Each product has its own curing instructions, so make sure to check them. You should also try to plan your sealing project around a time when you can count on having at least 48 hours of dry weather after you apply the sealer.
Year-Round NJ Paver Maintenance Schedule
By maintaining your pavers in New Jersey in accordance with the changing seasons, you can prevent damage before it even occurs. Each season comes with its own set of maintenance tasks, and by keeping up with all four, you can greatly decrease the chances of having to pay for costly repairs or premature replacement.
Spring: Post-Winter Inspection
After the last frost, take a slow walk around your entire paver area. Look for any pavers that may be rocking, low spots where water may be pooling, open or sunken joints, and any areas where frost heave may have pushed the pavers out of alignment. These are all signs that there may be base movement or joint failure that needs to be addressed before the next winter cycle makes it worse. Spring is also the time to rinse away any leftover ice melt product from the surface and joints, reseed joint sand where it may have washed out, and treat any early weed growth before it establishes a root system underneath the pavers.
Summer: How Often to Clean and Preventing Stains
During the summer, you can expect a lot of organic debris to accumulate quickly, especially if you have trees, garden beds, or an outdoor kitchen nearby. You should plan to sweep or blow off your pavers at least once a week. If you let organic matter sit in the joints, it will break down and provide food for weed seeds and algae spores. Keeping your surface clean during the summer will save you a lot of work when fall comes around.
Stains are another summer worry. Grease from grills, food and drink spills from outdoor parties, and tire marks on driveways can quickly seep into unsealed or aging-sealed pavers. The rule is straightforward: deal with stains right away. Applying a paver-safe degreaser within hours of a spill is simple. A grease stain that has set and baked into a paver surface in the summer sun for two weeks is a much more difficult issue.
Here’s a helpful chart to guide you through the process of removing common summer stains from your pavers:
Summer Stain Removal Guide
Stain Type Recommended Treatment Response Window Grease / Cooking Oil Paver-safe degreaser + stiff brush Within 24 hours Food & Beverage Spills Rinse immediately, then mild paver cleaner Within 1 to 2 hours Tire Marks Solvent-based paver cleaner or dedicated tire mark remover Within 48 hours Algae / Green Staining Paver-safe algaecide + pressure rinse Treat at first sign Efflorescence (White Mineral Deposits) Efflorescence remover + neutralizing rinse After surface is dry
If your pavers are properly sealed, most of these stains will sit on top of the sealer film and wipe away with minimal effort. That protective layer is exactly what justifies the time and cost of sealing — and why delayed sealing ends up costing homeowners far more in cleaning and repair than the sealing project itself would have.
Fall: Joint Sand Top-Offs and Pre-Winter Prep
For New Jersey paver owners, fall is the most crucial season for maintenance — and it’s the one most people overlook. The work you do between September and November directly impacts how your pavers endure the winter. Leaves need to be removed from the surface regularly, not just once. Organic debris that sits in joints over fall creates the perfect conditions for staining, algae, and accelerated joint erosion once spring arrives.
Autumn Preparation for Pavers — Before the First Hard Freeze
Task Why It Matters Timing Weekly removal of leaves and organic debris Prevents staining and algae growth in joints Throughout fall Check for rocking or misaligned pavers Unstable pavers worsen significantly under freeze-thaw stress October Refill joint sand where settled or washed out Full joints block water infiltration into the base October Inspect and clear drainage channels Standing water near pavers accelerates frost heave October to November Schedule sealing if within maintenance window Sealing before freeze protects joints through winter Before nighttime temps drop below 50°F
Joint sand inspection is the task that gets overlooked most often, and it is the one that matters most heading into winter. If sand has settled more than a quarter inch below the paver surface, water will fill that space, freeze, and begin forcing pavers apart from below. Topping off with polymeric sand in October — before the ground freezes — is one of the best maintenance steps a New Jersey homeowner can take.
Make sure to schedule any necessary repairs for rocking, cracked, or misaligned pavers before November. Once the ground freezes, it will be impossible to repair the base until spring. If you allow your pavers to go into winter in a compromised state, they will almost always come out worse. It’s best to have a professional evaluation in early fall. This way, any issues can be caught while they are still relatively easy and inexpensive to fix.
Winter: Essential Tips for Safe Snow Removal and Ice Melt
Winter Ice Melt and Snow Removal: NJ Paver Guide
Method / Product Safe for Pavers? Notes Plastic snow shovel Yes Best option — no risk of surface scratching Metal-bladed shovel Use carefully Can chip or scratch paver edges and surface Snow blower Yes (with clearance) Keep blade slightly raised above paver surface Plow blade (rubber-edged) Yes Metal plow edges can damage and dislodge pavers Sodium chloride (rock salt) No Corrosive to sealer, joints, and paver surface Calcium magnesium acetate (CMA) Yes Paver-manufacturer recommended alternative Magnesium chloride Yes (moderate use) Less corrosive than sodium chloride; use per label Sand (for traction) Yes Zero chemical exposure; sweep up in spring
The way you remove snow is as important as the product you use. Always shovel with the paver joints — meaning push snow parallel to joint lines rather than digging into them at an angle. Angled shoveling can pull joint sand out and dislodge pavers over time, particularly when the ground is frozen and the base has less flex. Leave a thin layer of snow rather than scraping all the way to the paver surface when using metal equipment.
For those who have a plow service for their driveway, it’s crucial to let the contractor know that the surface is made of pavers and not asphalt. If a plow blade is set too low, it can catch the edges of the pavers and pull them out of alignment. This can lead to needing to relevel the surface and possibly even doing base work to correct the issue. Plow blades that have rubber edges are much safer for driveways with pavers.
When the snow melts in the winter, take a leisurely stroll over your paved surfaces and look for places where water tends to gather. These low spots are a sign that something is wrong. Make a note of them or take a picture so that you can discuss them with a professional before the next freeze. If water is pooling on the surface, it usually means that there are drainage issues or the base is settling underneath.
How to Tell When Your Pavers Need More Than Just Maintenance
Most of the time, paver problems don’t just appear overnight. They develop slowly, over time, and you might not notice anything is wrong until the problem has become serious. But, if you know what to look for, you can catch problems early, before they become too big to handle. Some signs of trouble include pavers that move or rock when you step on them, spots where water always seems to gather after it rains, joints that are wider than a quarter of an inch, white mineral deposits (also known as efflorescence) on the surface of the pavers, and any place where several pavers next to each other have all shifted or tilted in the same direction.
The final symptom — a cluster of pavers shifting in unison — usually suggests a failure in the base rather than a single paver settling. If the base beneath the bedding layer is damaged by frost heave, inadequate drainage, or problems with the initial installation, the pavers will move as a unit instead of one at a time. In this case, you’ll need a professional to evaluate the problem and correct the base, not just add more sand and reseal the area.
Understanding the 3-to-5-Year Resealing Guideline for NJ Pavers
The 3-to-5-year resealing guideline most paver manufacturers and contractors recommend isn’t just some random number. It’s based on the average lifespan of most residential-grade paver sealers under typical New Jersey conditions. A high-traffic driveway that’s constantly exposed to the weight of vehicles, fuel drips, and winter de-icing products will likely need to be resealed closer to the 3-year mark. On the other hand, a lightly used backyard patio in a shaded, protected area may be able to go the full 5 years or even a little longer before it needs to be resealed.
There’s a quick and easy way to check whether your pavers need resealing: just pour a little water on them. If the water forms a bead and doesn’t sink in, the sealer is still doing its job. If the water sinks in within a few seconds, your sealer has worn off and it’s time to reseal. South- and west-facing surfaces usually lose their sealer first due to exposure to UV light, so check these areas first. This simple test only takes five minutes and it’s a surefire way to know whether your pavers need resealing.
Have a Pro Inspect Your Pavers Before Small Issues Become Big Problems
Sealing your pavers yourself and doing basic maintenance each season can go a long way toward keeping your pavers looking great and lasting a long time — but there’s only so much you can tell by looking at the surface. Problems with the base moving, drainage under the surface failing, or issues with the structural joints require someone who knows what they’re doing (and sometimes special equipment) to properly diagnose. If you wait until you can see that there’s a problem, chances are it’s going to cost a lot more to fix than it would have if you’d caught it early.
Having a professional look at your pavers every year, or at least whenever you spot any of the red flags we mentioned earlier, will give you a clear picture of how your pavers are really doing, beyond just how they look on the surface. This is especially important during the first few years after installation, because that’s when any problems related to settling (which is normal after construction) are likely to pop up. Catching these issues early makes them a lot easier to fix than if you let them get worse over time.
When to Hire a Pro vs. Do It Yourself
Scenario DIY or Hire a Pro? Regular cleaning and sealing (surface in good shape) DIY is an option Polymeric sand top-up on settled joints DIY is an option Isolated rocking paver (1 to 2 pavers) DIY is an option, if done carefully Several neighboring pavers shifting as a section Hire a pro Constant standing water or drainage problems Hire a pro Visible frost heave or serious base settlement Hire a pro Cracked pavers in multiple places Consider hiring a pro for an evaluation Efflorescence over a large surface area Consider hiring a pro for an evaluation
Sage Landscape Contractors and Tree Experts serve homeowners in Central New Jersey and have firsthand knowledge of local soil conditions, seasonal drainage patterns, and the specific freeze-thaw damage profiles common to this region. If your pavers are showing any of the warning signs discussed in this guide, the most cost-effective step you can take is to schedule a professional evaluation now — before winter.
Common Questions
Many New Jersey homeowners have the same questions about sealing their pavers. Unfortunately, the advice they receive often doesn’t take into account the unique challenges posed by the New Jersey climate. The answers provided below are specifically tailored to address these challenges.
Here are some of the most frequently asked questions that homeowners have when they’re planning a sealing project or trying to figure out what’s wrong with an existing installation:
- Which type of sealer can withstand New Jersey’s harsh winters?
- Have I missed my chance to seal this year?
- What can I use on ice that won’t damage my pavers?
- How can I tell if my base is damaged or if it’s just the surface?
- Do weeds indicate a problem with my joints?
You’ll find brief answers to these questions below. For a more detailed explanation of each topic, refer to the relevant section earlier in this guide.
What’s the common thread in all these responses? New Jersey’s climate is tougher on pavers than most of the country. Products, timing, and techniques that work well in milder climates often don’t cut it here. Tailoring your approach to the local environment is what distinguishes a paver installation that still looks great after ten years from one that needs major repairs after five.
What type of sealer should I use on my pavers in New Jersey?
- Concrete pavers on driveways: Opt for a water-based acrylic film-forming sealer that can handle freeze-thaw conditions and vehicle traffic. Also, make sure it can lock polymeric joint sand.
- Natural stone patios: Use a penetrating silane-siloxane sealer that protects from the inside without changing the surface appearance or creating a film that can peel.
- Brick pavers: Apply a water-based acrylic or polyurethane sealer with UV stabilizers in two thin coats.
- High-traffic areas: Sealers enhanced with polyurethane offer better abrasion resistance than standard acrylics and are worth the extra cost on driveways.
No matter which type of sealer you choose, make sure the manufacturer specifically rates it for freeze-thaw cycling. Not all sealers have this feature — many sold in warmer climates do not include it, and they will not work reliably through a New Jersey winter.
While solvent-based sealers continue to offer impressive durability, their use is becoming more limited in New Jersey due to regulations on VOC content. Water-based options have come a long way over the past ten years and are now the practical and compliant choice for most NJ homes.
Steer clear of any sealers that do not provide clear information about their expected lifespan and reapplication schedule. A high-quality sealer will have these details clearly stated. If a sealer’s label is vague, it’s a good indication that it is a low-quality product that will not withstand the conditions in New Jersey.
Should you find yourself uncertain about which product is best for your particular paver material and installation circumstances, a professional contractor with experience in New Jersey hardscape work can suggest the right product based on firsthand knowledge — not just what is available on the store shelf.
Is it possible to seal my pavers during the winter in NJ?
Unfortunately, no — sealing your pavers during the winter in New Jersey is not feasible for most of the season. Paver sealers can’t cure properly once nighttime temperatures consistently fall below 50°F. Water-based sealers will freeze before they bond, and solvent-based products won’t adhere properly to cold surfaces. If you missed the fall sealing window, it’s best to wait until late spring when temperatures are consistently within the acceptable range for at least 72 consecutive hours before trying to seal.
How can I prevent weeds from sprouting between my pavers?
The most effective long-term solution is to use polymeric sand in the joints, combined with sealing. Polymeric sand hardens after installation and leaves significantly less open space for weed seeds to germinate. Sealer further reduces the moisture and organic material in joints that weeds need to establish roots. For existing weed growth, remove weeds by hand or with a targeted herbicide safe for hardscape use, allow the area to fully dry, refill joints with polymeric sand, and then seal. Consistent fall leaf removal also helps, since decomposing organic matter in joints is what weed seeds need to germinate in the first place.
Can rock salt harm my sealed paver driveway?
Yes — even sealed pavers aren’t completely safe from rock salt damage if you use it often. Sodium chloride breaks down the sealer film faster than normal wear and tear would, removing the protective layer and leaving the paver surface directly exposed to salt. On unsealed pavers, the damage is immediate and accumulative — salt brine seeps into joints and the paver material itself, leading to surface spalling and joint erosion. The best way to protect your sealer and the pavers underneath it through New Jersey winters is to switch to calcium magnesium acetate, magnesium chloride, or sand for traction.
How can I tell if my paver base has been affected by frost heave?
Damage from frost heave manifests itself in ways that are different from regular surface wear. Look for groups of pavers — typically three or more that are next to each other — that have all moved upwards or tilted in the same direction. Single pavers that wobble or tip when weight is applied in an area that was previously stable are another sign. Depressions that appear after the winter and do not go away as the ground thaws suggest that the base has settled unevenly due to the freeze-thaw cycle.
Here’s an easy test: take a slow stroll on the surface after the final frost of the season and press down hard on each paver. If you notice any movement, flexing, or hear a hollow sound when you tap it, it indicates that the bedding layer underneath has lost contact with the base. At this point, you need a professional assessment — the pavers will need to be lifted, the base evaluated and possibly regraded, and the installation relaid from the bedding layer up.
Allowing frost heave damage to go unchecked for another season can lead to further deterioration of the base, significantly increasing the repair area and cost. The sooner base problems are identified and fixed, the more of the original installation can be saved.
If you’re noticing any of these signs this spring, it’s a good idea to get a professional assessment before next fall. We, at Sage Landscape Contractors and Tree Experts, provide expert hardscape inspection, paver repair, and seasonal maintenance services throughout New Jersey. Contact them to schedule an evaluation and protect your investment before the next freeze cycle starts.